hometutorialsmy stuffDIYfashionbeauty

Tuesday, July 10, 2012

Curly Side Waterfall Braid

Here comes another waterfall braid! But, who doesn't love braids? Especially if they are curly and loose. The best thing about these braids is that the technique is very easy to achieve and they don't take a lot of time. You cant wear it for almost every event, ans easily combine clothes. Get ready for this fantastic & romantic side braid.


Begin by curling all of your hair loosely with a flat iron. Then backcomb all of your roots to add body and extra grip for the bobby pins. Section out the hair on the heavy side from your ear forward and clip it aside for later. Take the rest and put it in a low side ponytail. Only pull the hair halfway through the pony the last time to create a loop. Use your fingers to scrunch up and spread out the curls around the loop, bobby pinning the hair in place to create a messy bun. Let down the remaining hair and do a loose waterfall braid, drape the end of the braid across the top of the messy bun and secure it with bobby pins and finish with hairspray. 

Monday, July 9, 2012

Overlapping Half-Up, Half-Down Hairstyle

Summer is in full swing and everyone is looking for a fresh trendy hairstyle. The last thing you want to do is add more heat to your hair during these hot months and this striking style is perfect regardless of whether your hair is thick, thin, straight or wavy. Plus, the overlapping technique is so easy to achieve! So give this stunning look a try!


 Step 1: Take a small strand of your hair from above the ear.

 Step 2: Take a bobby pin and pin it 3/4th's of the way down your hair strand.

Step 3: On the other side, pull a small strand of about the same amount as your last one. And pull it opposite direction as the first strand. 

 Step 4: Take the second strand and pin it under the first strand.

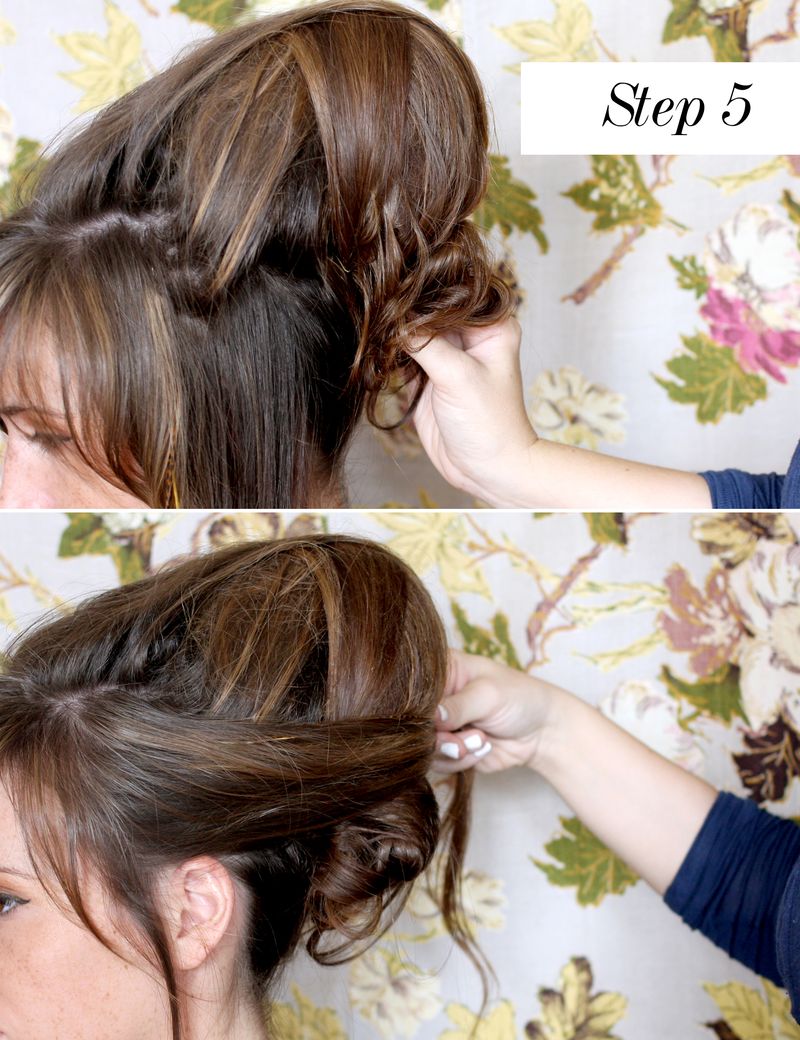
Step 5: Take a new strand from under the first strand and pull it over the second strand. Then bobby pin the third strand right under the second.

 Repeat this 2 more times until you achieve this look. Make sure that everything is tight. Have fun!

Saturday, July 7, 2012

Low Bun

This is the perfect season for messy beach hair and easy elegant buns. So when you're getting ready for a night out, don't forget to try some beautiful bun tutorials. And have a lot of them in my blog archive! But most of them are from a Beautiful Mess and so is this one! It's simple and looks fantastic! 


Start by separating a few stick strands from the top of your head and tease them by brushing the hair up toward your head. Then pull your hair down, styling it into a low pony. Fluff up the teased part of your hair. Now use a hair tie to keep it in place. Separate the hair of your pony tail in a half, tease the upper half. Use the lower half  (the unteased hair) and flip over the top or your teased bun. Warp the hair around the base of the bun and pin it. At the end, style any loose strands.

Thursday, July 5, 2012

Happy 4th Of July!

Happy Independence Day to all of you! Even thought I'm not celebrating it, I seem to like the holiday very much. So, I've found some amazing hair tutorials for this special day. And also wanted to share some very yummy summer treats that I'm about to try today!

First of, here is the Firecracker Ice Pops recipe by Martha Stewart! They look so delicious and sweet!

And here's the list of Independence Day hairstyles that you can try. I've chose the three very simple and cute tutorials. As you can see, everything includes braids. I think they are very appropriate for holidays. First there's the fishtail braid. I really like them and they are easy to make. Second, there's the waterfall braid. And at the end, there's the third one -  one side braid-bun. Sadly, I don't have that hair tutorial in my blog archive, so try something similar here!

Happy holidays friends! 

Tuesday, July 3, 2012

Style A Beehive

Well here's a very beautiful 1960' inspired hair tutorial. When I say beehive, it automatically reminds me on the girl who marked it - Amy Winehouse. I really respect her work and love some of her songs, like "Valerie". But this post is about the amazing beehive hairstyle. Honestly, it's not that hard when you're having the right supplies. The supplies needed: a bath loofa ( any color ), a piece of fabric that matches the color of your hair ( large enough to cover you loofa ), a rubber band, bobby pins and hair spray.


Step 1: cover your bath loofa with a solid fabric that matches your hair color. 

Step 2: pull one small section of hair forward ( leave unteased ). Gather a 1-2 inch section, spray and back-comb it. Repeat with 2-3 more sections. 

Step 3: Add the loofa to your hair. Wherever you position the loofa will be where the bump sits. Cover it with pieces of hair and pint each one down. Continue to cover it from every direction untill the loofa is completely hidden.

Step 4: pull the pieces from the sides of the hair back to cover the sides of the bump.  

Step 5: choose to pull the back of the hair up or leave it down ( Amy Winehouse style)! And done! This tutorial is very easy and beautiful! Have fun!

Credit: to my favorite blog - a Beautiful Mess. I just love them and their new design! xxx

Finally!!!

Hello you guys! Yes! It's official! Our new layout is finally done! I really hope you like it. Just to be clear, the picture that I've used is just a picture that I found on some random tumblr page. It's not my propriety. But even thought It hasn't been taken by me or something like that, I really really hope that you like the complete new layout. Leave me a comment! 


Related Posts Plugin for WordPress, Blogger...